Foundation Single Crochet (FSC)
I thought it would be a nice idea to do a little tutorial for those of you who had never heard of or didn't know how to do a foundation single crochet. It's so simple, yet makes such a huge difference in the finished product.
When starting a chain, some people use a bigger hook than they use for the rest of their project. That's because the chain has little to no give once you start putting your stitches in. This can result in a slight bend on that first row. Soooooo, for this project of placemats, I really wanted all sides to be as straight as possible. That's why I decided to start out with a foundation single crochet!
When starting a chain, some people use a bigger hook than they use for the rest of their project. That's because the chain has little to no give once you start putting your stitches in. This can result in a slight bend on that first row. Soooooo, for this project of placemats, I really wanted all sides to be as straight as possible. That's why I decided to start out with a foundation single crochet!
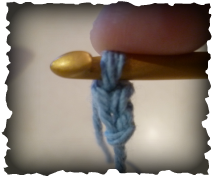
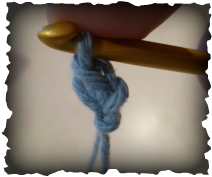
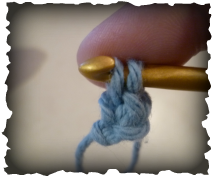
Start with a slip knot and chain 2
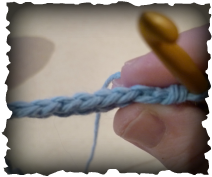
Insert your hook into the first chain that you created
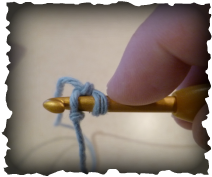
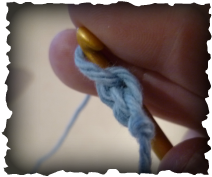
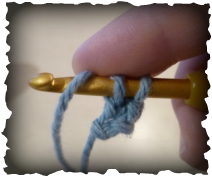
Yarn over
Pull yarn through 1st loop so you have 2 loops remaining on your hook

Yarn over again
Pull yarn through remaining loops
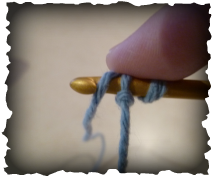
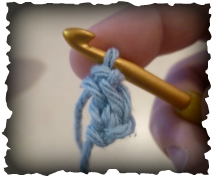
If you turn your work slightly to the left and look, you will see what your hooking has created. This is where you will be inserting your hook in the next step, between the chain and single crochet
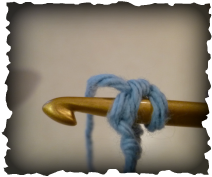
This is somewhat of a side view of where to stick your hook
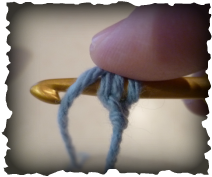
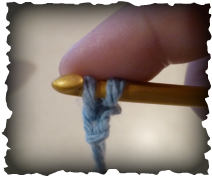
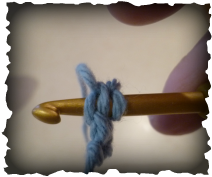
Again, yarn over. You will be repeating the previous steps
Pull yarn through the first loop so that you have 2 loops remaining on your hook
Yarn over
Pull yarn through remaining loops
Tilt work slightly to the side again and find the chain that you created and insert your hook into the chain
Keep repeating the steps until you build up a bit of hooky work. This is the chain side that was created
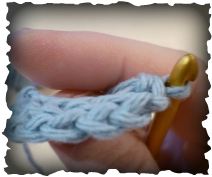
And this is the single crochet row that was created on the opposite side
Once you get your work to the desired length, just turn as usual and work across using whatever stitches your project calls for.
Feel free to contact me with any questions or problems!
Feel free to contact me with any questions or problems!
"Yarn & Project Fund"
